
eSIM Tokyo : guide to staying connected in the capital
TL;DR — Tokyo, capital of 14 million people and 37 million in the wider metropolitan area, is one of the best 4G/5G-covered cities in the world. An eSIM activated on the NTT Docomo network captures signal in 99.9% of the 23 wards, including Tokyo Metro and Toei subway lines, up to 30 metres underground, in the underground passageways of Shinjuku and even on the Tokaido Shinkansen to Kyoto. For 5 to 10 days in the capital, plan for 10 to 20 GB to cover Google Maps, translation, Instagram photos and WhatsApp calls without frustration. QR-code activation takes 2 minutes, works the moment you land at Narita or Haneda, and saves you the 30-50 minute queue at physical SIM counters. This guide details the neighbourhoods, the metro, the risk areas, and the right data plan for your trip.

Why choose an eSIM for Tokyo over Pocket WiFi or roaming
Tokyo is paradoxically one of the trickiest cities to navigate when it comes to connectivity: three networks (NTT Docomo, SoftBank, KDDI au), 13 Tokyo Metro lines plus 4 Toei lines, 30 JR and private lines, and underground shopping arcades that stretch for kilometres (Yaesu, Marunouchi, Shinjuku). An eSIM activated on NTT Docomo — the legacy network with the best indoor coverage in Japan (99.9% of the territory per official 2025 figures) — solves the equation in 2 minutes: QR code scanned, profile installed, signal captured before you even leave Terminal 1 at Narita. Compared to a Pocket WiFi at ¥800 to ¥1,500 per day ($28 to $52 over a week, plus deposit and return), the eSIM costs $25 to $50 per week for 20 GB and lives inside your phone — no extra battery to charge, no device to lose.
Against US carrier roaming options (Verizon TravelPass at $10/day, T-Mobile Magenta included but throttled to 256 kbps after 5 GB, AT&T International Day Pass at $12/day), the PlanJapan eSIM delivers genuine premium 4G/5G with no throttling. More than 60% of English-speaking travellers we equip in Tokyo choose a 20 GB plan, considered optimal for 7 to 10 days of heavy Maps use, cloud photos and occasional music streaming. For remote workers logging in from an Asakusa Airbnb or a Shibuya café, the unlimited option removes any calculation. If you're weighing eSIM against a physical Japanese SIM (B-mobile, Sakura Mobile), our dual SIM, eSIM and local Japanese SIM comparison breaks down the practical trade-offs.

Network coverage in Tokyo: Docomo, SoftBank, KDDI ward by ward
Tokyo is broadly perfectly covered, but actual performance varies by neighbourhood and carrier. NTT Docomo, the legacy operator founded in 1992 and still the market leader (38% market share in 2025), delivers the best indoor performance thanks to its dense mesh of 700 and 800 MHz antennas (low frequencies with strong building penetration). In Shibuya, at the corner of the famous scramble crossing crossed by 2,500 pedestrians per cycle, 5G NSA runs at 320 to 450 Mbps download (2025 Speedtest average). At Shinjuku, beneath the world's busiest station (3.6 million passengers per day, 53 exits, 36 platforms), Docomo holds signal at every level down to B5F, where SoftBank frequently drops at levels B3F and below.
SoftBank shines in surface tourist zones: Asakusa, Senso-ji, the Sumida River, Ueno Park — its Massive MIMO 3.5 GHz network delivers 280 to 380 Mbps in those areas. KDDI au, the third operator, performs strongly in Roppongi, Akasaka and the business spine Marunouchi-Otemachi with 5G SA active on 2.3 GHz. Rakuten Mobile, the fourth operator since 2020, offers the cheapest unlimited plans (¥2,980/month) but its indoor coverage in Tokyo still needs work: excellent at surface level, weak in basements and enclosed malls like Don Quijote Mega Shibuya or Tokyu Hands Shinjuku. A PlanJapan eSIM automatically prioritises Docomo, then falls back to SoftBank when Docomo saturates in peak season. For real-world speeds measured across all three operators, our eSIM speed tests across 12 Japanese cities publishes raw timestamped numbers per site.
eSIM in the metro and Shinkansen: where it really catches signal
The Tokyo metro (Tokyo Metro 9 lines + Toei Subway 4 lines) has been fully 4G-covered since April 2024 thanks to an NTT Docomo–Tokyo Metro partnership that installed 600 dedicated tunnel antennas. In practice, you stay connected between stations on the Yamanote, Ginza, Marunouchi, Hibiya, Tozai and Chiyoda — no dropouts, no Spotify buffering when the train enters the tunnel. 5G NSA is rolled out across 70% of the metro network by end of 2025, with practical underground speeds of 80 to 150 Mbps (more than enough for Maps, WhatsApp, YouTube 1080p). The JR Yamanote, Chuo Rapid and Sobu lines, running at surface or semi-underground level, still capture over 200 Mbps.
On the Shinkansen, the Tokaido line (Tokyo–Nagoya–Kyoto–Shin-Osaka) stays connected over 99% of the route thanks to long-range 700 MHz antennas aligned along the tracks. You keep the signal in long tunnels like Shin-Tanna (7.8 km), with brief one to two-second drops at most. Speeds range from 60 to 180 Mbps depending on your position in the train and the area crossed — plenty to answer emails or follow a sports match streaming. The Tohoku Shinkansen to Sendai, the Joetsu to Niigata and the Hokuriku to Kanazawa offer the same quality. Only the Aurora Express to Hakodate shows a few dead zones in the longest Hokkaido tunnels. Our full deep-dive eSIM in the Shinkansen: measured coverage line by line publishes signal charts for every route.
How many GB to plan for Tokyo: 5 days, 7 days, 10 days
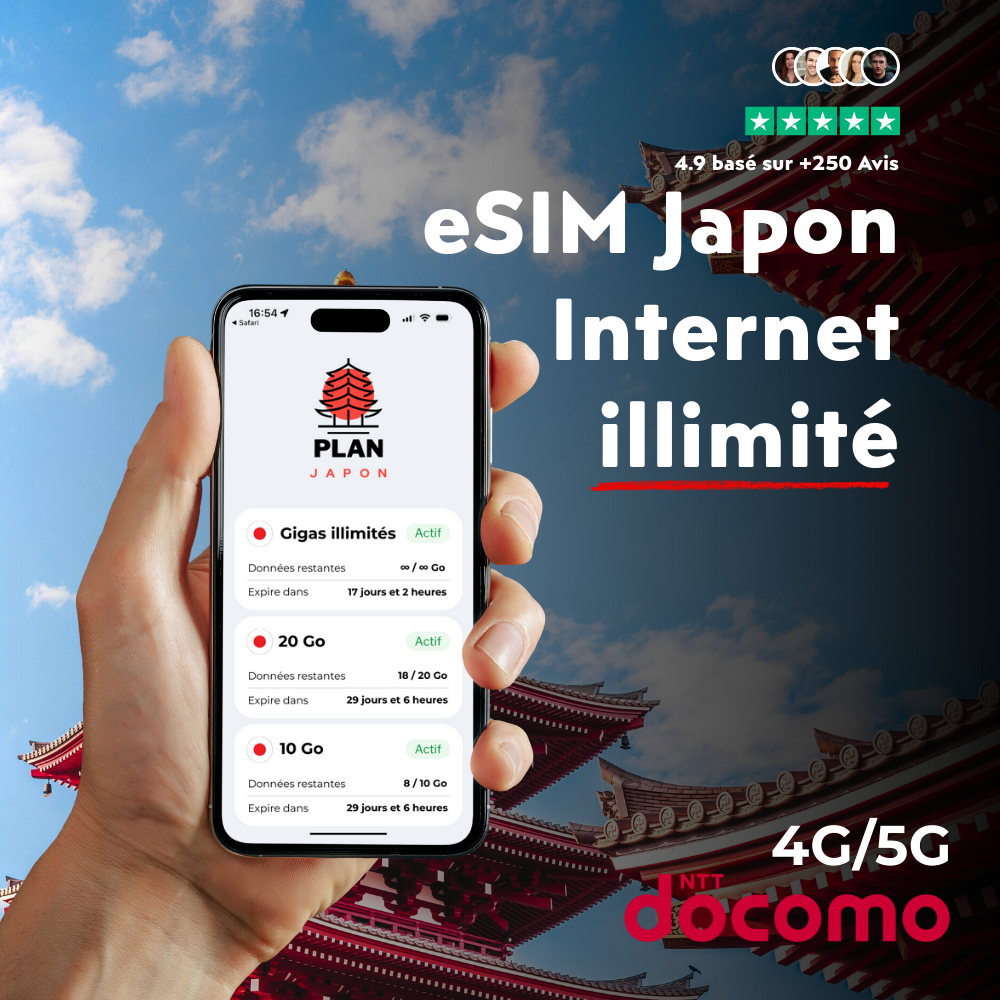
The rule of thumb that matches our customers' real usage in Tokyo: count 1.5 to 2 GB per day in "intensive discovery" mode — that is, Google Maps on for 6 to 8 hours, 20 to 40 photos saved to iCloud or Google Photos, 1 to 2 hours of Instagram and TikTok scrolling, continuous WhatsApp and iMessage, plus a few Tabelog and Google Translate lookups on the fly. For a typical 5-day stay (arrival, Shibuya–Shinjuku, Asakusa–Ueno, Akihabara–Ginza, departure), a 10 GB plan suffices for 80% of travellers, provided you don't stream Netflix in your hotel room at night. Over 7 days, the 20 GB plan becomes the reference — it offers a comfortable margin for sharing a hotspot with a partner, downloading offline maps or posting 1080p reels.
Over 10 days or more, or if you combine Tokyo + Kyoto + Osaka, look at the 30 or 50 GB plan. The 50 GB remains our recommendation for the vast majority of travellers planning Tokyo–Kansai–Hiroshima over 12 to 14 days: at $35, it offers a cost per GB lower than any Pocket WiFi (¥700 to ¥1,500/day for 10 GB shared). Digital nomads working from a Daikanyama café with Zoom, Loom and Notion open all day burn 4 to 6 GB per day — for this profile, the unlimited eSIM removes all surprises. To calibrate your exact need, our eSIM Japan data calculator: how many GB per traveller profile breaks down scenarios by duration and use case.
Activating your eSIM at Narita or Haneda: step-by-step procedure
Activating a PlanJapan eSIM takes 2 minutes and can be done before departure or on arrival. The recommended method: install the profile in your home country 2 to 3 days before the flight, but activate it only on landing. Step 1: open the PlanJapan email you received after purchase, which contains your QR code and credentials. Step 2 on iPhone: Settings > Cellular > Add eSIM > Use QR Code. Scan the QR with the camera, or enter the SM-DP+ address and activation code manually. Step 3: label the profile "Japan" to distinguish it from your home line. Step 4: in Default Cellular Data, select your home line for calls but enable "Japan" for mobile data.
On Android (Samsung Galaxy, Google Pixel, Xiaomi, OnePlus — all eSIM-compatible since 2020): Settings > Connections > SIM Manager > Add Mobile Plan > Scan the QR code. The profile installs in 30 to 60 seconds. On landing at Narita (Terminal 1, 2 or 3) or Haneda (Terminal 3 international), toggle airplane mode for 10 seconds then off: the PlanJapan eSIM auto-switches to NTT Docomo and Google Maps works before you even reach baggage claim. Remember to fill in Visit Japan Web (vjw.digital.go.jp) 72 hours before the flight to generate your customs QR code — clearance then drops to 3 to 5 minutes instead of 20 to 30. If you hit any signal issue, our eSIM Japan troubleshooting: 12 causes and 12 fixes covers every real-world case we've seen.
Hotspot, dual SIM and eSIM Tokyo: what you need to know
Connection sharing (tethering) works without restriction on PlanJapan eSIM plans — unlike some US carrier roaming plans (T-Mobile Magenta caps hotspot at 5 GB at full speed) that block or heavily throttle it. In practice, in Shibuya or Asakusa, your iPhone 15 Pro shares its Docomo 5G NSA with a MacBook, an iPad, your partner's iPhone or a WiFi-enabled camera (Sony A7 IV, Fuji X-T5). Shared speeds run at 150 to 280 Mbps, enough for two people on video calls simultaneously. On consumption, plan for 2 to 3 GB shared per day for two travellers in normal use — so pick the 30 or 50 GB if you plan to tether intensively. Our guide to Japan eSIM pricing by plan and operator details the cost per GB by profile.
The dual SIM setup is ideal to keep your home number reachable during the trip. On iPhone XS and newer, you keep your US SIM physical Verizon/AT&T/T-Mobile active only for banking 2FA SMS (3D Secure) and emergency calls, while the Japanese PlanJapan eSIM handles 100% of mobile data. On Samsung Galaxy S22 and newer, the hybrid dual SIM mode works the same. Important: explicitly disable roaming on your home SIM in Settings > Cellular > Data Roaming = OFF — otherwise you risk a hefty bill if you accidentally re-enable roaming. For travellers with a cellular iPad or eSIM-enabled Apple Watch, note that these devices need their own eSIM plan (a single eSIM profile doesn't share between two devices). To compare real 5G performance across Tokyo's 23 wards, our analysis of NTT Docomo 5G coverage in Japan publishes an up-to-date heatmap.
Specific traveller profiles: families, students, business, long stay
For a family of 4 in Tokyo, two strategies compete. Strategy A: a shared unlimited plan via hotspot from one parent's smartphone — economical ($50 a week) but draining the host phone's battery (pack an Anker 20,000 mAh power bank). Strategy B: a 20 GB eSIM per teen and an unlimited plan for the parent sharing with younger kids. For children under 12 with no smartphone, most Tokyo hotels (APA, Toyoko Inn, Sotetsu Fresa, Mitsui Garden) offer free in-room WiFi — limiting data use during family evenings.
Students on exchange at the University of Tokyo (Todai), Waseda, Keio or Sophia usually leave for 4 to 12 months. For this profile, the short-term PlanJapan eSIM covers the first 30 days while you open a long-term Japanese SIM account with Rakuten Mobile, IIJmio or Sakura Mobile (20 GB plans at ¥1,800/month or about $12). Business travellers based in Marunouchi, Otemachi or Shiodome typically use the 20 GB eSIM over 5 to 7 days with Microsoft Teams, Slack, Notion and email running in the background. For long-stay digital nomads in Asakusa, Nakano or Shimokitazawa who stay 1 to 3 months and want a stable coworking connection from WeWork Marunouchi or Tokyo Toranomon Hills, the 30-day unlimited eSIM remains the best no-commitment compromise. To benchmark your plan against international competitors, our ranking of the best eSIMs for Japan in 2026 compares 14 providers across 8 measurable criteria.
Quick fixes: 7 common Tokyo issues and their solutions
Issue 1 — "No signal" on landing: 90% of the time it's the APN that didn't switch automatically. Fix: Settings > Cellular > Network Selection > Automatic OFF then ON, or restart the phone fully. Issue 2 — Signal bars but no internet: check the eSIM profile is enabled and set as default data line. Issue 3 — Extreme slowness on the Yamanote at peak hours (8-9 am, 6-8 pm): the network is saturated with 350,000 passengers/hour; speed returns to normal 10 to 15 minutes after the peak. Issue 4 — Drop in the Marunouchi or Yaesu underground arcades: rare case, switch to the mall's free WiFi (Tokyo Station City offers 1 free hour per session).
Issue 5 — Japanese pop-up you don't understand: use Google Lens in photo mode to translate live. Issue 6 — Hotspot disconnecting every 5 minutes: turn off battery saver mode while sharing. Issue 7 — eSIM data exhausted before the end of the trip: top up from your PlanJapan account, active in 30 seconds without reinstalling the profile. For deeper dual SIM settings per phone model, see our dual SIM guide for Japan: iPhone and Android.
FAQ — eSIM Tokyo: connection guide for the capital
Does the PlanJapan eSIM work everywhere on the Tokyo metro?
Yes, the Tokyo metro (Tokyo Metro and Toei Subway, 13 lines total) has been fully covered in 4G/5G since April 2024 thanks to the NTT Docomo–Tokyo Metro partnership. You keep signal between stations, inside tunnels, on platforms and in the underground passageways down to 30 metres deep. Practical speeds run at 80 to 150 Mbps underground and 200 to 400 Mbps at surface level.
How much does an eSIM cost for 7 days in Tokyo?
A 20 GB plan for 7 days costs $25 to $35 at PlanJapan, versus $50 to $90 for an equivalent Pocket WiFi once the deposit is counted. For 5 days, the 10 GB plan at $18 to $25 is more than enough. For 10 days or more, the 30 or 50 GB plan offers the best cost-per-margin ratio — especially if you're planning Tokyo + Kyoto + Osaka.
Does the eSIM activate automatically at Narita or Haneda airport?
Yes, as soon as you turn off airplane mode on landing and you've pre-installed the eSIM profile before departure. The handover takes 10 to 60 seconds on average. Google Maps works before you even reach baggage claim. If nothing happens after 2 minutes, restart the phone — that's the most efficient way to force automatic NTT Docomo selection.
Is my iPhone or Samsung eSIM-compatible in Japan?
All iPhone XS and newer models (released since 2018) support eSIM. On Android, Samsung Galaxy S20 and newer, Google Pixel 3 and newer, Xiaomi Mi 11 and newer, OnePlus 11 and Huawei P40 and newer are compatible. To verify your exact model, open Settings > General > About > IMEI (eSIM IMEI should be present). US-sold iPhones since iPhone 14 are eSIM-only (no physical SIM tray), which doesn't change the activation procedure.
Can I share the eSIM connection with a MacBook or iPad?
Yes, connection sharing (hotspot or tethering) works without restriction on PlanJapan plans. You share NTT Docomo 5G with a MacBook, iPad, WiFi-enabled camera or a second phone at 150 to 280 Mbps. Plan for 2 to 3 GB shared per day for two travellers in normal use — pick a 30 or 50 GB plan if you tether heavily, or unlimited for zero hassle.
Should I keep my home SIM active in Tokyo?
Yes, keep your physical home SIM active to receive security SMS (banking 3D Secure, authentication codes, etc.) but make sure to disable data roaming: Settings > Cellular > Data Roaming = OFF. The PlanJapan eSIM handles 100% of mobile data, sparing you any home-carrier roaming surprises.
Does the PlanJapan eSIM work on the Shinkansen to Kyoto or Osaka?
Yes, the Tokaido Shinkansen line (Tokyo–Nagoya–Kyoto–Shin-Osaka) stays connected over 99% of the route thanks to the 700 MHz long-range network installed along the tracks. You keep signal in long tunnels like Shin-Tanna (7.8 km) with brief 1 to 2-second drops at most. Speeds range from 60 to 180 Mbps depending on your position in the train — enough to answer emails or stream Netflix in HD.
Related articles:
- Tokyo travel guide: neighbourhoods, transport, budget and must-sees
- eSIM Tokyo: network performance ward by ward and Speedtest data
- Activating your eSIM at Narita and Haneda: full airport guide
- The best apps to prepare and live your Tokyo trip